So, you’ve taken the plunge and bleached your hair. You’re staring at that lightened canvas, a perfect base for a vibrant new shade, and the excitement is real. But then, a wave of hesitation washes over you. What if it comes out patchy? What if I cause even more hair damage? The fear of turning your hair into a fragile, uneven mess can be paralyzing.
We get it. That’s why we’ve created this definitive guide to turn that anxiety into confidence. Dyeing pre-lightened hair at home doesn’t have to be a high-stakes gamble. By following our 5 foundational rules, you’ll learn how to achieve stunning, vibrant color while prioritizing your hair health. Consider this your roadmap to a flawless, salon-worthy finish, right from your own bathroom.
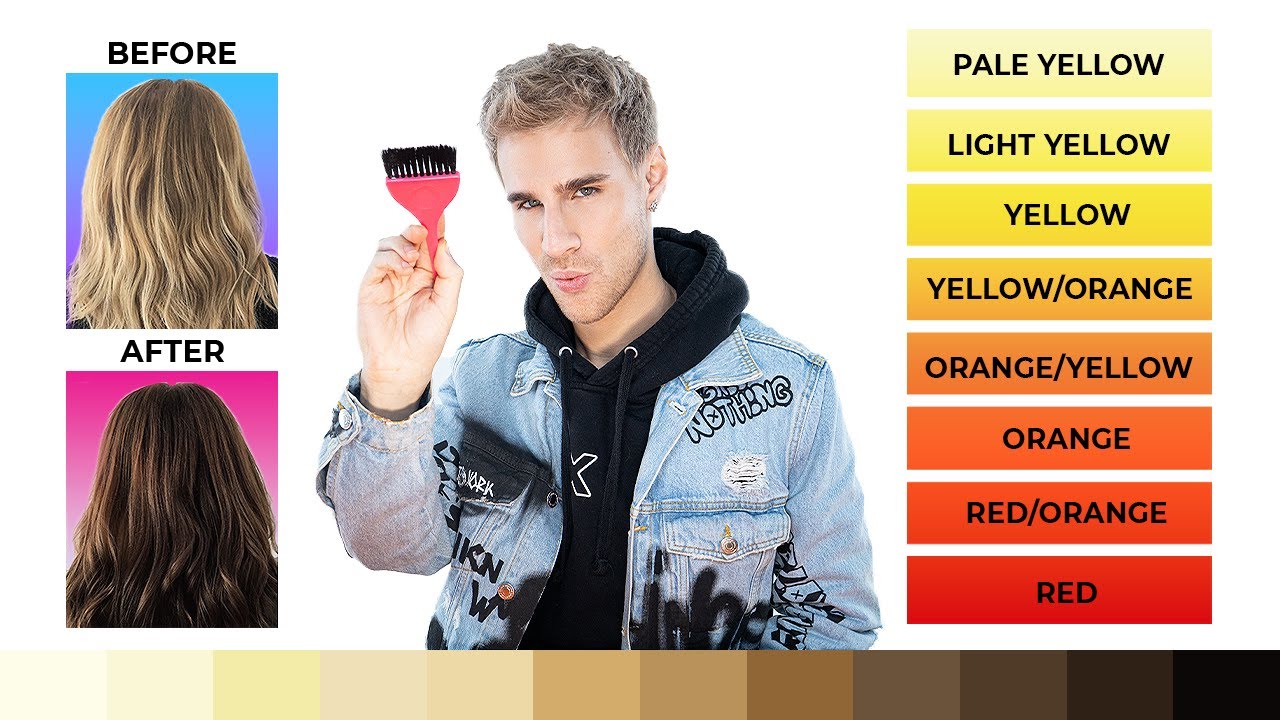
Image taken from the YouTube channel Brad Mondo , from the video titled The easiest way to do a color fill (blonde to brunette) .
Now that you’ve decided to embrace a new shade and perhaps a bold new look, the real adventure begins.
From Fragile to Fabulous: Conquering At-Home Dyeing on Bleached Hair
The transformation from bleached to brilliantly colored hair at home is truly one of the most exciting beauty projects you can undertake. There’s an undeniable thrill in turning that pale canvas into a vibrant masterpiece, a testament to your personal style and creativity. Yet, we understand that for many, this excitement is often accompanied by a quiet hum of apprehension. Dyeing hair that’s already been pre-lightened presents unique challenges that differentiate it significantly from coloring virgin hair.
The Unique Canvas: Bleached Hair
When your hair has been bleached, its natural pigment has been lifted, leaving the cuticle layer slightly raised and the strand itself more porous. This makes it an incredibly receptive canvas for new color, allowing for brighter, truer shades to emerge. However, this increased porosity also means the hair can absorb color unevenly, leading to potential patchiness, or become more susceptible to damage if not handled with care. The dream of a uniform, radiant hue can quickly turn into a fear of unexpected, splotchy results or, worse, further compromising your hair’s health.
Overcoming the Fear: Your Guide to Flawless Color
We get it. The common fears of causing more damage, ending up with an uneven tone, or seeing your beautiful bleached base turn an unexpected shade are entirely valid. You’ve invested time and effort into lightening your hair, and the last thing you want is to jeopardize its condition or the outcome of your desired color. But here’s the good news: achieving a stunning, vibrant color and maintaining your hair’s health during the at-home dyeing process is not only possible but entirely within your reach.
To guide you through this exhilarating journey, we’ve distilled the wisdom of countless successful at-home colorists into five foundational rules. These aren’t just suggestions; they are your non-negotiable pillars for transforming your bleached locks into a bold, healthy, and beautifully colored mane. Adhering to these principles will empower you to navigate the process with confidence, ensuring you achieve the vibrant color you envision while safeguarding the integrity of your hair.
This comprehensive guide will walk you through each step, offering clear, actionable advice to ensure your at-home coloring experience is not only successful but also safe and satisfying. Get ready to banish those fears and embrace the art of coloring your pre-lightened hair with precision and flair.
To start this journey on the right foot, our very first rule tackles what many overlook: the essential preparation.
Building on our guide to safe at-home hair dyeing, the very first, non-negotiable step to achieving a beautiful and even color — especially on bleached hair — is proper preparation. Skipping this crucial stage is like building a house without a strong foundation; no matter how good your materials, the final result will be unstable and disappointing.
Beyond the Bottle: Why Your Hair’s Thirstiness Dictates Your Dye Job (and How to Conquer It)
Before you even think about mixing that dye, understanding how your hair behaves is absolutely vital. The secret to a gorgeous, even color lies in what we call hair porosity.
Understanding Hair Porosity: The Thirsty Truth
Think of your hair’s outer layer, the cuticle, like shingles on a roof.
Hair porosity refers to your hair’s ability to absorb and retain moisture and, by extension, hair dye.
- Low porosity hair has tightly closed cuticles, making it difficult for moisture (or dye) to penetrate.
- Medium porosity hair has slightly raised cuticles, allowing for good absorption and retention.
- High porosity hair has very open or damaged cuticles, which soak up moisture quickly but also lose it just as fast.
Why is this critical for bleached hair?
Bleaching is a chemical process that lifts your hair’s natural pigment by opening and often damaging the cuticle. This leaves your strands highly porous, meaning they’re like a sponge with large, irregular holes. When you apply dye to highly porous hair, those open, inconsistent cuticles will "grab" the color unevenly. Some sections will absorb too much pigment and look darker, while others will absorb less, leading to patchy, streaky, or dull results. Imagine trying to paint a wall with uneven plaster – the color won’t look consistent!
The Power of Protein Filler: Your Even-Color Shield
This is where a protein filler becomes your hair’s best friend, especially if you have bleached or damaged hair. Think of it as a primer for your hair, much like you’d prime a wall before painting to ensure an even finish.
- What it does: A protein filler helps to temporarily fill in the gaps and holes in your hair’s open cuticles caused by bleaching. It deposits proteins that rebuild the hair’s structure just enough to create a more uniform surface.
- Why it’s crucial: By evening out the hair’s porosity, the protein filler creates a neutral base. This allows the hair dye to be absorbed more consistently across all strands, preventing those unwanted dark spots or faded patches. The result? A much more vibrant, even, and professional-looking color application.
- How to use: Most protein fillers are applied to clean, towel-dried hair before you mix or apply your hair dye. Always follow the specific instructions on the product packaging for the best results.
Pre-Dye Due Diligence: Patch and Strand Tests
Before you commit to coloring your entire head, two vital tests can save you from potential allergic reactions and color catastrophes.
The Allergy Alert: Performing a Patch Test
Your safety is paramount! A patch test (also known as a skin sensitivity test) is absolutely essential to check for any allergic reactions to the hair dye formula. Even if you’ve used the same brand before, sensitivities can develop over time.
- Preparation: Mix a tiny amount of the dye components according to the instructions (usually a pea-sized amount).
- Application: Apply a small amount of the mixed dye to a clean, discreet area of skin, such as behind your ear or on the inside of your elbow.
- Wait: Leave the test area undisturbed for 48 hours. Do NOT wash it off.
- Check: After 48 hours, check the area for any signs of redness, itching, swelling, burning, or irritation. If any reaction occurs, do not use the product.
The Color Preview: Performing a Strand Test
A strand test is your crystal ball for predicting the final color result on your specific hair. This is particularly important for bleached hair, as its unique porosity can make colors appear differently than on virgin hair or the shade shown on the box.
- Preparation: Isolate a small, inconspicuous section of hair (about 1/4 inch wide), ideally from an area that won’t be easily seen, like underneath your top layer.
- Application: Apply the mixed hair dye to this strand, ensuring it’s fully saturated.
- Processing: Let the dye process for the minimum recommended time listed in the instructions. Check it periodically by wiping a small section of the strand with a damp paper towel to see the color.
- Adjust: If the color isn’t intense enough, allow it to process longer, continuing to check every few minutes. Note the exact time it takes to achieve your desired shade. This will be your processing time for your entire head!
- Rinse & Dry: Once you achieve your desired color, rinse the strand thoroughly and let it dry completely to see the true final shade.
Patch Test vs. Strand Test: Knowing the Difference
| Feature | Patch Test (Allergy Test) | Strand Test (Color Preview Test) |
|---|---|---|
| Purpose | To check for skin allergies/sensitivities to the dye. | To preview the final color result on your hair and determine processing time. |
| What it tests | Your skin’s reaction to the dye. | How your hair will absorb and react to the dye. |
| When to do it | 48 hours before you plan to dye your hair. | Right before you dye your hair (after the patch test passes). |
| Where to do it | Discreet skin area (behind ear, inner elbow). | Small, inconspicuous section of your actual hair. |
| Outcome | Determines if it’s safe to use the dye. | Determines if you’ll like the color and how long to leave it on. |
Why Preparation is Non-Negotiable
We can’t stress this enough: proper hair preparation is the absolute most critical step in your at-home dyeing journey. It’s the difference between a salon-worthy result and a frustrating, uneven disaster. By understanding your hair’s porosity, using a protein filler, and performing both a patch and strand test, you’re not just ensuring beautiful color; you’re also protecting your hair’s integrity and your own well-being. Don’t skip these steps – your hair (and your confidence) will thank you.
With your hair perfectly primed and prepped, you’re now ready to tackle the next big decision: choosing the right type of dye for your desired look.
Once you understand your hair’s unique porosity and have prepped it for its transformation, the next crucial step is selecting the right color formula.
Depositing Dreams, Not Damage: Navigating Demi-Permanent and Permanent Dyes
Choosing the right type of hair dye is paramount, especially when your hair has already undergone the lightening process. It’s not just about picking a shade; it’s about understanding how the dye interacts with your hair’s structure to achieve your desired outcome without compromising its health. This decision can be the difference between vibrant, healthy-looking color and further damage or an undesirable result.
The Fundamental Difference: Demi vs. Permanent
At their core, demi-permanent and permanent hair dyes serve different purposes and interact with your hair in distinct ways. Understanding these differences is key to making an informed, hair-friendly choice.
Demi-Permanent Hair Dye
Demi-permanent dyes are fantastic for adding tone, refreshing faded color, or blending grey hairs without a harsh commitment. They work by depositing color onto the hair shaft and just slightly into the outermost layer of the cuticle. They do not contain ammonia, or contain very low levels, and use a low-volume developer (typically 10 volume or less) which gently opens the cuticle just enough for the color molecules to penetrate.
- No Lift: They cannot lighten your natural hair color. Their purpose is solely to deposit color.
- Fades Gracefully: Since the color molecules aren’t deeply embedded, demi-permanents gradually fade over 6-8 weeks (or 12-24 shampoos), offering a less permanent change and no harsh root line.
- Gentle on Hair: The gentler formulation means significantly less damage, making them ideal for hair that’s already been chemically processed, like bleached hair.
Permanent Hair Dye
Permanent hair dyes are designed for long-lasting color changes, including significant lightening or darkening, and full grey coverage. They work by using ammonia (or an ammonia substitute) to open the hair cuticle more aggressively, allowing color molecules and a higher-volume developer (typically 20 volume or more) to penetrate deep into the hair’s cortex.
- Lift and Deposit: They have the ability to lighten your natural pigment while simultaneously depositing new color. This is why they can lighten dark hair or provide complete grey coverage.
- Lasting Change: Once the color is in the cortex, it’s a permanent change. It won’t wash out but will eventually grow out, leading to visible roots.
- More Damaging: The more aggressive chemical process required to lift and deposit color can be more damaging to the hair, especially if it’s already compromised.
To help visualize these distinctions, here’s a quick comparison:
| Feature | Demi-Permanent Hair Dye | Permanent Hair Dye |
|---|---|---|
| Best For | Toning, adding shine, refreshing color, blending greys | Significant color changes, full grey coverage, lightening |
| Damage Level | Low | Moderate to High |
| Developer Used | Low-volume (10 or under) | Higher-volume (20+) |
| Color Longevity | Fades in 6-8 weeks | Lasts until it grows out |
Why Demi-Permanent is Your Best Friend for Bleached Hair
If your hair has been bleached, it’s already in a delicate state. Bleaching lifts the natural pigment by aggressively opening the hair’s cuticle, which can leave it porous, prone to breakage, and susceptible to further damage. This is precisely why we strongly recommend opting for a demi-permanent hair dye for toning or adding color to bleached hair.
Using a demi-permanent dye allows you to deposit the desired tone (like an icy blonde, a rich brunette, or a vibrant fashion shade) without further stressing your already compromised strands. It’s about nurturing your hair back to health while still achieving beautiful color, rather than inflicting more trauma with chemicals designed to lift color.
The Unsung Hero: Understanding Your Developer
Often overlooked, the developer is just as important as the color itself. It’s the catalyst that activates the color and enables it to penetrate the hair shaft. For bleached hair, the choice of developer is absolutely critical to prevent further damage.
You must use a low-volume developer (10 or under). Here’s why it’s essential:
- Deposits, Doesn’t Lift: A low-volume developer only gently opens the hair cuticle, allowing the color molecules to deposit into the hair without initiating any significant lifting of the existing pigment. Since your hair is already bleached to your desired lightness, you absolutely do not want to lift it any further.
- Prevents Further Damage: Using a higher-volume developer (like 20 or 30) on bleached hair would attempt to lighten it even more, causing unnecessary and potentially severe damage, leading to breakage, extreme dryness, and an uneven, patchy result.
- Optimal for Toning: When toning bleached hair to neutralize brassiness, a low-volume developer ensures that the toner can effectively deposit the counteracting pigments without affecting the underlying lightness you’ve worked hard to achieve.
Choosing the Correct Undertone: Your Secret Weapon Against Brassiness
After bleaching, it’s common to see unwanted warm tones emerge – often yellow or orange, commonly referred to as "brassiness." This happens because underlying warm pigments are exposed as the natural hair color is lifted. To achieve your target shade and neutralize this brassiness, you need to understand the color wheel.
- Neutralizing Yellow Tones: If your bleached hair has a distinctly yellow undertone, you’ll want a dye with a violet or purple undertone. Look for shades labeled ‘ash violet’, ‘pearl’, or with a ‘.2’ or ‘V’ designation in professional color lines.
- Neutralizing Orange Tones: For more orange or brassy tones, you’ll need a dye with a blue undertone. These are often labeled ‘ash’ or ‘matte’ or have a ‘.1’ or ‘B’ designation.
- Neutralizing Red Tones: While less common after bleaching to blonde, if any stubborn red tones persist, a green undertone will neutralize them. These are sometimes labeled ‘ash green’ or ‘M’ for matte.
By selecting a demi-permanent dye with the correct neutralizing undertone, you’re not just adding color; you’re creating a balanced, harmonious canvas that will perfectly reflect your desired final shade. Always read the dye label carefully to identify the underlying tone and ensure it complements your goal.
With your ideal color choice and developer in hand, you’re now poised to move on to the practical steps of bringing your vision to life.
After carefully considering whether a demi-permanent or permanent dye is right for your hair goals, the true magic of transformation lies in how you apply it.
Beyond the Bottle: Your Blueprint for a Flawless Hair Dye Application
Bringing your chosen hair color to life requires more than just squeezing a bottle; it’s an art that combines preparation, precision, and patience. Mastering the application process is crucial for achieving that salon-quality, even color from root to tip, ensuring no missed spots or harsh lines. Let’s walk through each step to make your at-home dye experience a resounding success.
Preparing for Perfection: Setting the Stage
Before you even think about opening a dye bottle, a little prep goes a long way. This initial phase sets you up for a smooth, mess-free, and effective application.
Gather Your Arsenal
Ensure you have all necessary tools within arm’s reach. Most at-home dye kits come with some basics, but these additions can make a huge difference:
- Gloves: Usually provided, but extra pairs are handy.
- Old Towels: To protect surfaces and clothing.
- Petroleum Jelly or Barrier Cream: To protect your skin along the hairline and ears.
- Hair Clips: Non-metallic, for sectioning.
- Comb: For precise sectioning.
- Non-Metallic Mixing Bowl & Applicator Brush: If your kit doesn’t include them, or if you prefer professional tools.
- Timer: Essential for accurate processing.
The Dry Hair Foundation
Always start with dry, unwashed hair (ideally 24-48 hours after your last shampoo). Natural oils provide a protective barrier for your scalp and help the color adhere better.
- Detangle Thoroughly: Brush out all knots to ensure smooth application.
- Section Your Hair: This is perhaps the most critical step for even coverage. Using the end of your comb, divide your hair into four main quadrants:
- From your forehead to the nape of your neck (down the middle).
- From ear to ear, across the crown.
- Secure each section with a clip. For very thick hair, you might want to create even smaller subsections within these quadrants.
The Application Odyssey: From Mix to Masterpiece
With your hair perfectly prepped, it’s time to dive into the application itself. Remember, consistency is key!
Mixing Your Magic Potion
Follow the instructions provided in your dye kit precisely. This typically involves:
- Don Your Gloves: Protect your hands from staining.
- Combine Developer and Dye: Squeeze the entire contents of the color cream tube into the developer bottle or mixing bowl.
- Shake or Stir Vigorously: If using a bottle, cap it tightly and shake until the mixture is uniform. If using a bowl, stir with your non-metallic brush until thoroughly blended.
Section by Section: The Application
Work quickly and methodically. Hair dye starts processing the moment it’s mixed.
- Start at the Roots (First-Time Dyers or Root Touch-ups):
- Unclip one of your back sections.
- Using the applicator nozzle or brush, apply the dye to the roots first, working in small, thin subsections. The roots, being new hair, often require more processing time.
- Pro Tip: For root touch-ups, be extra careful to apply only to the new growth to avoid overlapping onto previously colored hair, which can lead to damage or darker bands of color.
- Work Through to the Ends:
- Once roots are covered in a section, gently pull the dye through the mid-lengths and ends of that section. Ensure every strand is coated.
- Pro Tip: If you’re doing a full-head application and your ends are already significantly lighter or more porous, you might apply to the roots first and then apply to the ends only for the last 10-15 minutes of the processing time to prevent over-darkening or damage.
- Repeat for All Sections: Continue this process for all four main sections, unclipping and reclipping as you go, ensuring no area is missed.
The Saturation Secret: No Patchy Spots!
Full saturation is the cornerstone of even color. If hair isn’t fully saturated, you’ll end up with patchy, uneven results.
- Don’t Skimp on Product: It’s better to use slightly more dye than too little.
- Work it In: Gently massage the dye into your hair with your gloved hands, especially at the roots and nape of your neck, to ensure every strand is drenched.
- Check the Back: Use a mirror to check the back of your head – it’s easy to miss spots there!
The Waiting Game: Processing with Precision
This is where your initial strand test becomes invaluable.
- Set Your Timer: Based on your strand test, set a timer for the precise processing duration. Never guess, and never leave the dye on longer than recommended, as this can lead to damage, a darker-than-desired color, or even scalp irritation.
- Resist the Urge to Check: While it’s tempting, constantly peeking or running your fingers through your hair can disrupt the processing.
- Keep Warm (Optional): Some people find that wrapping their hair in a plastic cap helps maintain warmth, which can aid in color development, but always follow kit instructions.
The Grand Finale: Rinsing for Radiance
Once your timer goes off, it’s time to reveal your new shade. The rinsing process is vital for stopping the color development and locking in vibrancy.
- Emulsify (Optional but Recommended): Before rinsing completely, add a small amount of warm water to your hair and gently massage it for a minute or two. This helps to loosen any residual dye and create a more thorough cleanse.
- Rinse Until Clear: Rinse your hair under the faucet or shower with cool to lukewarm water. Continue rinsing until the water runs completely clear. This can take several minutes, so be patient.
- Cool Water: Your Color’s Best Friend: Finishing with cool water is not just a preference; it’s a critical step. Cool water helps to seal the hair’s cuticle, trapping the color molecules inside. This locks in your vibrant new shade, enhances shine, and prevents premature fading.
- Condition: Apply the conditioner provided in your kit (or a color-safe deep conditioner). Leave it on for the recommended time to nourish and smooth your hair, then rinse thoroughly with cool water.
With your stunning new color sealed and shining, remember that its vibrancy and longevity depend on the care you give it next.
Having meticulously mastered the art of applying your desired hue, the journey to stunning, long-lasting color is only half complete.
Guard Your Glam: Essential Aftercare for Lasting Vibrant Color
The moment you step out of the salon, or finish your at-home dyeing session, marks a new beginning for your hair. Many assume the hard part is over, but in truth, the aftercare routine you adopt is just as crucial as the dyeing process itself – not only for maintaining hair health but also for locking in that vibrant shade you’ve worked so hard to achieve. Think of it as protecting your beautiful new investment; without proper care, even the most perfectly applied color can quickly fade or leave your hair feeling dry and brittle.
The Critical Waiting Game: Post-Color Patience
It might feel tempting to show off your fresh color with a luxurious wash, but patience is truly a virtue here. For optimal color longevity, you must wait 48 to 72 hours before your first wash with shampoo. This crucial waiting period allows the color molecules to fully set and bond deeply within the hair shaft. During the coloring process, your hair’s cuticle (the outermost layer) is opened to deposit color. Giving it time to fully close and seal ensures the color is locked in, preventing premature fading right from the start.
Here’s a quick guide for that initial delicate period:
| Do’s for the First Week of Aftercare | Don’ts for the First Week of Aftercare |
|---|---|
| ✅ Wait 48-72 hours before shampooing. | ❌ Don’t shampoo before the recommended waiting period. |
| ✅ Rinse with cool water if necessary (gently!). | ❌ Don’t use hot water on your hair. |
| ✅ Use a leave-in conditioner for detangling. | ❌ Don’t use heat styling tools excessively. |
| ✅ Protect your hair from direct sun exposure. | ❌ Don’t swim in chlorinated pools or saltwater. |
| ✅ Sleep on a silk pillowcase to reduce friction. | ❌ Don’t over-brush or roughly handle your hair. |
Choosing Your Color’s Best Friend: Sulfate-Free Care
Once you’ve passed the initial waiting period, your choice of shampoo and conditioner becomes paramount. To prevent color stripping and ensure your vibrant shade endures, it’s essential to switch to a professional-quality, sulfate-free shampoo and conditioner. Sulfates are harsh detergents commonly found in many hair products; while effective at cleaning, they can be incredibly aggressive on colored hair, quickly washing away your hard-earned hue and leaving your hair dry.
- Why Sulfate-Free? These gentler formulations cleanse your hair without disturbing the color molecules, helping your shade stay richer and more vibrant for longer. They also tend to be less drying, which is a huge bonus for hair that has undergone chemical processing.
- Professional Quality Matters: Investing in salon-recommended brands often means higher concentrations of beneficial ingredients and formulations specifically designed to protect and nourish colored hair.
Nourish and Restore: The Power of Deep Conditioning
Coloring, especially if it involves bleaching, can be demanding on your hair, potentially stripping it of natural moisture and protein. To combat this and restore your hair’s vitality, incorporate a weekly deep conditioning mask or protein treatment.
- For Moisture: A rich, hydrating mask will replenish lost moisture, smooth the cuticle, and leave your hair feeling soft, supple, and looking incredibly glossy. Look for ingredients like argan oil, shea butter, or hyaluronic acid.
- For Strength (Especially Bleached Hair): If your hair has been lightened or bleached, it likely needs a protein boost. Protein treatments help to rebuild the hair’s structure, strengthening weakened strands and preventing breakage. Use these judiciously – typically once every few weeks – as too much protein can make hair stiff.
By consistently integrating these dedicated aftercare steps into your routine, you’re actively working to maintain the integrity of your hair and the brilliance of your color. However, achieving lasting beauty goes beyond the initial weeks; it’s about forming consistent habits that protect your investment over the long haul.
While immediate post-color aftercare is crucial for locking in your new shade, truly preserving its beauty and health demands a more consistent, long-term approach.
Future-Proofing Your Fantastic Shade: Lifestyle Adjustments for Enduring Color and Health
Your journey to maintaining vibrant, healthy colored hair doesn’t end with a deep conditioning treatment. It’s an ongoing commitment, a set of mindful habits woven into your daily life that act as a shield against fading and damage. Think of these adjustments not as chores, but as strategic investments in the longevity and luminosity of your beautiful new color.
Wash Wisely: The Less-Is-More, Cool-Water Philosophy
One of the most impactful changes you can make for your hair’s longevity is to rethink your washing routine. Water, especially hot water, can cause hair cuticles to swell and open, allowing color molecules to escape. This means less vibrancy and a faster fade.
- Wash Less Frequently: Aim to extend the time between washes as much as possible. Consider incorporating dry shampoo on your non-wash days to absorb excess oil and refresh your roots. This not only preserves your color but also prevents your scalp from overproducing oils in response to frequent stripping.
- Embrace Cool Water: When you do wash, opt for lukewarm or cool water. This helps to keep the hair cuticle closed, sealing in your color and natural moisture. A quick rinse with cool water at the very end of your shower can provide an extra sealing boost.
The Non-Negotiable Shield: Always Use Heat Protectant
Heat styling is a significant culprit when it comes to both color fading and general hair damage. High temperatures can literally cook the color out of your hair, dulling its vibrancy, while also stripping moisture and causing dryness and breakage.
- Before Every Styling Session: Make a heat protectant spray or cream your absolute best friend. Apply it evenly through damp hair before blow-drying, and again before using any curling irons, straighteners, or hot rollers.
- Beyond Color: Remember, heat protectants don’t just shield your color; they also form a barrier that minimizes the direct impact of heat on the hair shaft, preventing the dreaded "fried" look and helping to maintain your hair’s overall health and strength.
- Mind Your Settings: Whenever possible, use the lowest effective heat setting on your styling tools and avoid concentrating heat on one section for too long.
Guard Against the Elements: Sun and Chlorine
Environmental factors are often overlooked aggressors that can rapidly diminish your hair’s vibrant color and overall health.
- Sun Protection: Just like your skin, your hair needs protection from the sun’s harsh UV rays. Prolonged sun exposure can cause color to fade, especially reds and coppers, and even shift tones in lighter shades.
- Simple Solutions: Wear a wide-brimmed hat when spending extended time outdoors. You can also use leave-in conditioners or sprays that contain UV filters specifically designed for hair.
- Chlorine Combat: The chemicals in swimming pools are notorious for stripping hair color and can even impart a greenish tint to lighter, bleached strands.
- Pre-Swim Prep: Before diving in, wet your hair thoroughly with clean, tap water. Your hair will act like a sponge, absorbing the fresh water instead of the chlorinated pool water.
- Barrier Up: Consider applying a leave-in conditioner or a small amount of hair oil before swimming to create an additional protective barrier.
- Post-Swim Rinse: Always rinse your hair immediately after swimming to wash away chlorine residue.
Trim Smart, Not Just When It’s Long: Preventing Breakage on Fragile Hair
Regular trims are vital for maintaining the health and appearance of all hair types, but they are absolutely essential for color-treated, especially bleached, hair. Bleaching, while transformative, can make hair more fragile and prone to damage.
- Snip the Splits: Color-treated and bleached hair is more susceptible to split ends. If left untrimmed, these splits can travel up the hair shaft, leading to more extensive damage and breakage. Regular trims remove these compromised ends, preventing further deterioration.
- Boost Hair Health: By removing unhealthy ends, you encourage healthier growth and give your hair a fuller, bouncier appearance. It keeps your overall style looking fresh and polished, preventing the "wispy" or "thinning" look that damaged ends can create.
- Protect Your Investment: Think of trims as a proactive measure. It’s far easier and less damaging to snip off a small amount of dry, split ends regularly than to wait until significant breakage requires a much more drastic cut.
By integrating these mindful practices into your daily routine, you’re not just maintaining your hair; you’re building a foundation for truly embracing its newfound vibrancy.
Frequently Asked Questions About Dyeing Bleached Hair? Follow These 5 Rules for Perfect Color
What are the most important rules to follow when dyeing over bleached hair?
When considering how to dye over bleached hair, remember to prioritize using high-quality dye, conducting a strand test, moisturizing deeply, and carefully monitoring the development time to prevent damage.
Why is a strand test so important before dyeing bleached hair?
A strand test is crucial before you dye over bleached hair because it lets you preview the final color. It also helps determine how long to leave the dye in to avoid over-processing your already sensitive hair.
What type of dye is best for dyeing over bleached hair?
Semi-permanent or demi-permanent dyes are often recommended when learning how to dye over bleached hair, because they are gentler and less damaging than permanent options. Look for dyes specifically designed for fragile or damaged hair.
How can I prevent my bleached hair from becoming damaged when dyeing it a different color?
To minimize damage while learning how to dye over bleached hair, deep condition your hair regularly before and after dyeing. Also, avoid heat styling and use color-safe products to maintain moisture and vibrancy.
You’ve made it! From careful hair preparation and choosing the right products to mastering the application and committing to long-term aftercare, you are now equipped with the knowledge to color your hair like a pro. Remember, the secret to gorgeous, lasting color on bleached hair isn’t luck—it’s following these 5 essential rules.
The power to achieve that vibrant, head-turning shade is officially in your hands. So go forward and create your masterpiece with confidence. Embrace your new look, enjoy your healthy hair journey, and get ready for the compliments to roll in. You’ve earned it!
